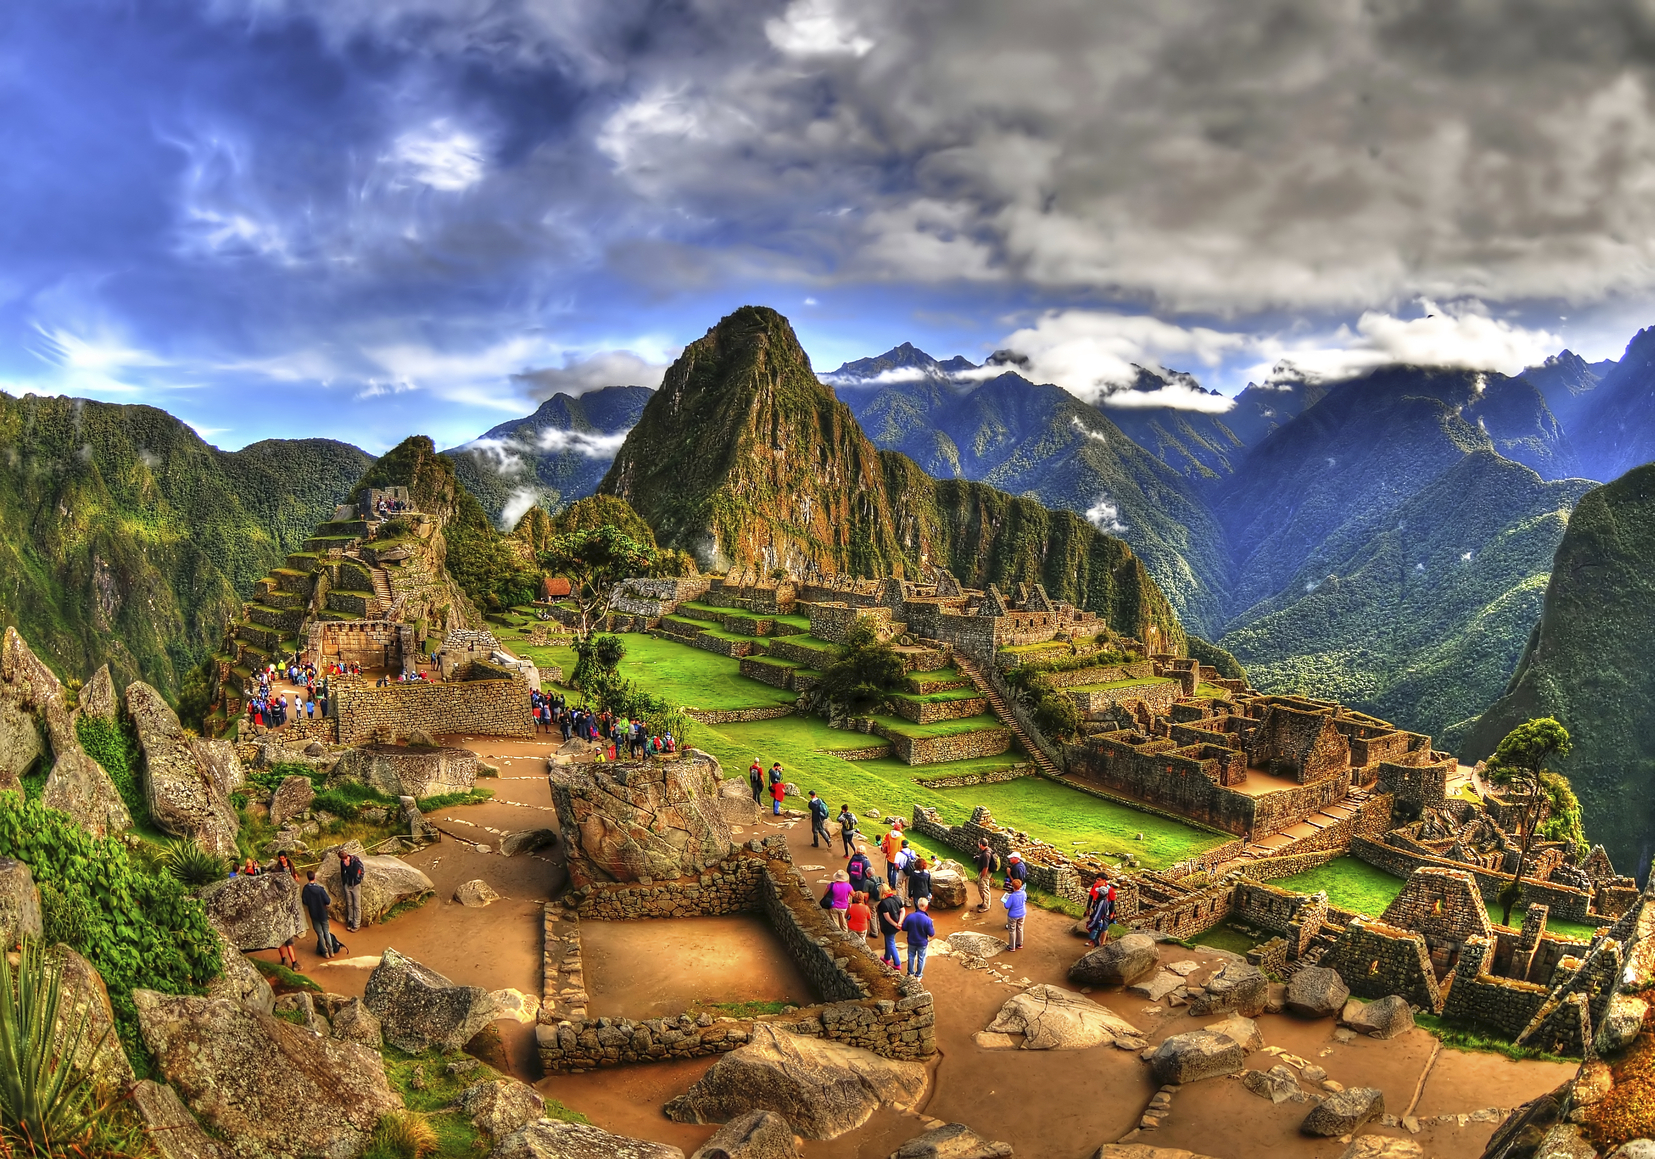
Hiking the Inca trail is no walk in the park. It’s a gruelling hike up. And if that isn’t enough you’re doing it all at altitude. For many this hike is part of a trip of a lifetime. Unfortunately, people are also lulled into a sense of complacency when it comes to preparation for the trek. More than 75,000 people do the trek each year. People in their late 60’s do the hike. So, how hard could it be?
Sorry to break it to you, but it’s hard. Really, really hard. It’s like using the Stairmaster at level 16 hard. It’s like taking the stairs to the top of the Empire State Building hard. But it’s also something YOU can do. From getting fit to getting packed, I’ve done all the research for you.
How to get Fit for the Inca Trail
Get Active
This is the easy part. Turn off your computer. Put down that phone. Get up off that couch and get moving. Start doing something active. Anything you do will help you get more fit. If you like swimming, go swimming. If you like hot yoga, sweat away. Take advantage of any chance you have to be active. Even small things can make a difference.
Start Walking
There’s no getting around this one. You have to start walking. Every. Single. Day.
The most popular trek is the 4 day/3 night tour. You will walk 14 km (8.7 miles) on the first day, 16 km (9.94 miles) on the second day and 10 km (6.2 miles) on the third day. If you can’t walk that distance at home, you won’t be able to walk it at altitude.
Start Counting
The average American only walks around 5000 steps each day which works out to about 4 km (2.5 miles) per day. You have to do better. Get yourself an activity monitor pedometer, a device that counts your steps, and start doing the minimum recommended 10,000 steps a day.
I personally use a Fitbit Alta. I like that it has interchangeable straps and takes the place of a watch. Unlike the majority of devices out there, this one can be dressed up with metal and leather bands as well as the classic band. Plus it reminds you to get moving each hour to help you reach your goal. I also like Fitbit because you can challenge your Fitbit wearing friends to challenges each week.

Step It Up
Start walking stairs. Walking stairs is hard, but so important. If you are doing the classic 4 day hike, you will be climbing 4000 ft in altitude on the morning of the second day, the hardest day of the trek. If you work in an office building start taking advantage of your free Stairmaster. Live in an apartment building? Get stepping!
I’m lucky to live in a city with a river valley and people flock to the valley stairs to get the ultimate workout.
Hike It Out
Walking on flat surfaces is relatively easy. You have to start bumping it up by adding uneven surfaces to your regimen. Go outside. Go for a hike. Go for a nature walk. When you walk on uneven surfaces your feet hit the ground differently each time. This helps to build up strength in your ankles and your feet. The stronger your ankles, the less likely you are to have an injury later.
Prepare for The Altitude
And if hiking 43 km (26 miles) isn’t enough, add in some altitude. Hiking at a high altitude makes everything harder. Don’t underestimate the effects. Altitude sickness can affect anyone, and it can be very serious.
Why The Altitude Makes It Hard
Without getting too technical here, as you go up in altitude there is less air. Less air means less oxygen. Less oxygen means your muscles can’t break down glucose, your bodies energy source, as quickly. Less glucose breakdown means less energy. The result is that your muscles are actually starving.
Get Acclimatized
The very best thing you can do for yourself is spend time at altitude. Most experts say that you should spend at least two days adjusting to the altitude before you begin your hike. Plan to spend a few days in Cusco before you begin your hike. There’s so much to do and see in the Cusco area that this is hardly a burden. Plus, it’s best to get those first few breathless days over when you have the luxury of sitting around drinking Pisco sours and watching the world pass you by.
Get a Prescription For Altitude Pills
Many trekkers choose to consult their physician to get a prescription for the drug acetazolamide, brand name Diamox, before they leave for their trek. The drug works to increase lung function, which leads to less shortness of breath, dizziness and headaches. Usually you take this for a few days before the trek as well as daily on your trek. Your doctor will help you decide if this is best for you.
Dress for Success
Leave your fancy clothes at home. Hiking the trail is all about comfort, and layering is key. The trail can be chilly in the morning, even in the summer months. At night temperatures can hover around 0 C (32 F), but by noon it’s 20 C (68 F) and you’ll be sweating from all the walking.
I’m Too Cold, I’m Too Hot, I’m Too Cold…
A fleece jacket over a light breathable long or short sleeve t-shirt allows you the most flexibility. A light rain poncho or jacket can be packed away until you need it. A wide brimmed hat is recommended to protect you from the sun. A beanie cap, or toque if you’re Canadian, helps keep you warm at night. You will get cold at night, so pack some extra leggings or sweats to wear at night.
It’s No Runway Walk
The trail is not a place for vanity. Trust me everyone will be wearing the same clothes, day after day. You can change your socks and underwear daily, but seriously consider wearing the same shirts each day. Most hikers suggest wearing hiking pants that zip off at the knee. Yes, those ugly things. It’s much easier to zip off a leg, then take your pants off in front of everyone to change into shorts. Especially when you might be cold again in ten minutes.
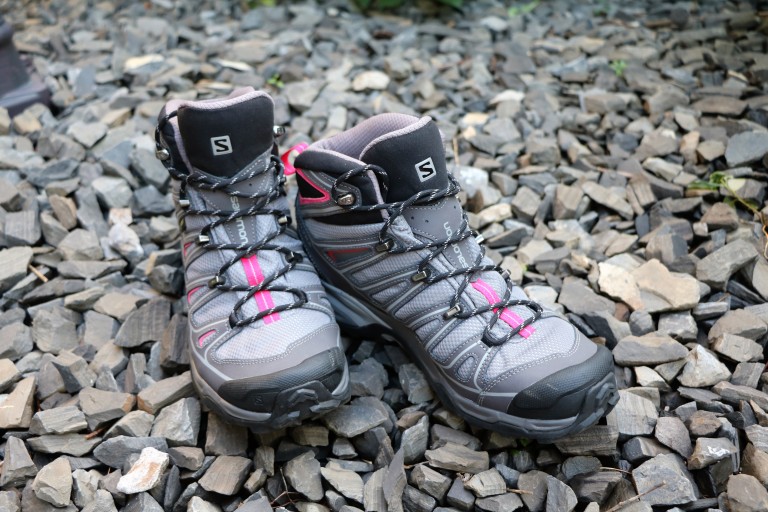 Put Your Best Foot Forward
By far the most important articles of clothing, if you can call them that, are your shoes and socks. No flip flops or sandals. You need to get yourself a pair of hiking boots and 3 pairs of good quality hiking socks. Although some people have hiked the trail in a pair of sneakers, it isn’t really recommended. The path is uneven and rocky at times. You go up. You go down. You go up again. Your ankles need some support.
You Get What You Pay For
You don’t need to spend hundreds of dollars getting heavy duty leather mountain hiking boots, but you don’t want to cheap out either. Expect to pay at least $150-$200 to get a good quality pair of mid height, water proof, light hiking boots. Go to a reputable store like REI or MEC and get help so they fit properly. Make sure they are comfortable in the store. Comfortable shoes will get more comfortable with wear, but uncomfortable ones will just get worse. Don’t forget to wear your hiking socks while you try on the shoes, or they will be too tight when you start wearing them.
Even Your Shoes Need To Practice
Once you’ve bought your shoes you need to give them a wearing in period. Start small. For about a week wear them inside only. Around your house. While you vacuum. When you make supper. Make sure you are wearing your hiking boots and have tied them up properly. This gives you a good opportunity to find out if these are the shoes for you. If not take them back and get the right ones.
Go Outside
After this it’s time to take them outside. Start small. Use them to walk your dog. Do your evening stroll in them. Do a small day hike. Give them at least 2 weeks of small walk wear before you even consider taking them for a big hike
All Day
The last step in your breaking them in process is to wear them all day. Pick three different days before you go and spend all day in your shoes. Consider this a practice run for your trek. On the trail you will be in your shoes from about 6:30 in the morning until 9:30 at night. Get used to spending an extended period of time in your shoes. Make them your friend.
You Need To Pack Light
With most companies you will be given a duffel bag to put your personal belongings in. Make arrangements with your hotel or tour company to leave the majority of your belongings back in Cusco.
Weight Limit
Most tour companies limit the duffel bag weight to 7 kg. This limit includes your sleeping bag and mattress, leaving you about 2 kg for your personal items. A few toiletry items, an extra t-shirt, a couple of extra pairs of socks, a pair of long underwear or leggings for the night is all you will need.
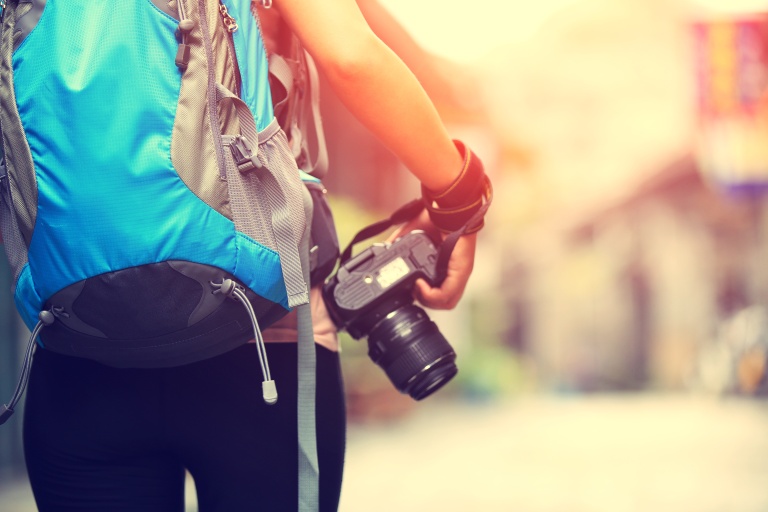
What’s In Your Daypack?
It’s worth picking up a small minimalistic day pack. It only needs to hold your water bottle, some sunscreen, and a camera. Leave some extra room to stuff your jacket in when you get warm, and your zipped off pant legs, they need to go somewhere.
Remember To Enjoy It
Hiking the Inca Trail is a once in a life time experience. The better you prepare, the better it is. But don’t forget to stop and enjoy the view. Take pictures, but remember be in the moment.
And if I can leave you with one more little tidbit of advice before you go…clip your toenails!!! Your feet will thank you.
Do you have a hiking story to share? I’d love to hear from you!
More on Peru…
Machu Picchu’s Dirty Little Secret

I have been reading up a lot about this and it just looks so amazing! Definitely worth all the hard work it takes to get prepared for it
LikeLiked by 1 person
We’re doing the trail this November. What I’m hating the most is doing stairs. I just hate them.
Thanks for reading.
LikeLiked by 1 person
I found you on facebook. Your blog layout is beautiful. I’d love to feature your blog post(s) on my curation blog sometime if you would give me permission. I am Jones Kassandra on facebook ✌🏼️
LikeLiked by 1 person
Thanks so much! I would love that!
LikeLiked by 1 person
I will be in touch soonish. Or you can email me at the address I left in the comment. Tysm!
LikeLike
Lots of good advice – especially clipping the toenails! 🙂
LikeLike
I’ve seen pictures taken by someone who didn’t. It wasn’t pretty! Thanks for reading.
LikeLiked by 1 person
Wow I totally didn’t know that there were so many stairs involved! If I ever go, I’ll definitely train myself at home. Thanks for the advice?
LikeLiked by 1 person
advice!*
LikeLike
It’s not really so many stairs, it’s just the walking up hill for hours on end. Thanks for reading.
LikeLiked by 1 person
Great tips! It’s a lot of preparation but looks definitely worth it! I can’t wait to do this too. I’m adding this to my bucketlist! 🙂
LikeLiked by 1 person
Thanks. I really need to start taking my own advice. Stairs. Ugh!
LikeLike
This “bucket list” trip was added to my life about 6 months ago. Love all of the information that your providing. Looking forward to the preparation journey.
LikeLiked by 1 person
Thanks so much Sherri. I’m going to check out your post too!
LikeLike
Great info. I will start my preparation now by walking all those stairs st work….with my hiking boots and dress pants. I look forward to the challenge ahead.
LikeLiked by 2 people
41K that’s a long trek! Power to you. Great post 🙂
LikeLike
Thanks so much, Jes!
LikeLike
Hi Mrs.Swanson! When I went hiking in Peru I drank all my water within the first 3 hours, Make sure you rationalize your water source or get one of those lifestraw water bottles because clean water is hard to find up high in the mountains! Also a good quality flashlight with high lumens helps when the sunsets at night 🙂
LikeLike
Thanks for all the great hints! We grabbed some led head lamps at Costco, but maybe we will grab an extra flashlight too!
LikeLike
Hi. I’ll be finishing the hike just before you start it! Good luck with your preparation.
LikeLiked by 1 person
Good luck on your hike. Will you be writing about it before November? I’d love to read about your Trek too!
LikeLike
I plan to take my notebook to write as I go. I’ll try to get it onto my blog as soon as I can when I arrive home (11 Nov).
LikeLiked by 1 person
Miss you, Molly
Love reading about where you are. I’ll start the stairs and clip my toenails in preparation. Happy and safe travels!! Cate at Shep
LikeLiked by 1 person